• Contact
  • Cookie Policy
  • Helpdesk
Techspark Blogging about technical stuff

Author Archives: Xerox

open-vm-tools: Unknown ioctl 1976

November 25, 2020 6:12 PM / 3 Comments / XeroX

Recently I setup my Raspberry Pi 4B 8GB ESXi Cluster. After compling and installing the open-vm-tools for Arm64/AArch64 I got alot of messages regarding “Unknown ioctl 1976”. This happens due to missing “VMCI_SOCKETS” module load during startup. You can simply fix this by adding the following lines to /etc/modprobe.d/blacklist.conf:

blacklist vsock_loopback
blacklist vmw_vsock_virtio_transport_common
install vsock_loopback /usr/bin/true
install vmw_vsock_virtio_transport_common /usr/bin/true

Posted in: ESXi, VMWare / Tagged: AArch64, ARM64, ESXi, open-vm-tools, VMWare

Synology Virtual Machine Manager increase vDisk Limit

November 25, 2020 4:11 PM / 7 Comments / XeroX

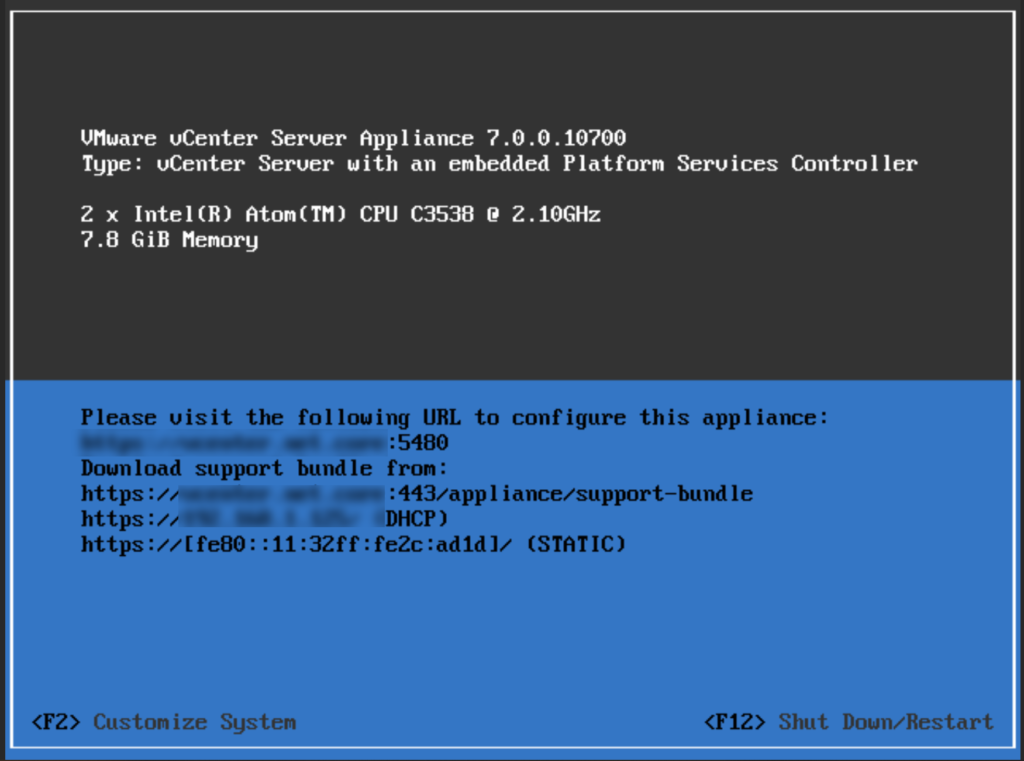
Recently I tried to run a VMware vCenter Appliance (vCSA) on my Synology. Trying to import the provided OVA File results in an unplausible error, so I tried to convert it with the OVFTool thats provided by VMware on the installation disk. I converted or extracted the vmdk diskimages via OVFTool, its basically achieveable by calling ovftool.exe <ova> file.

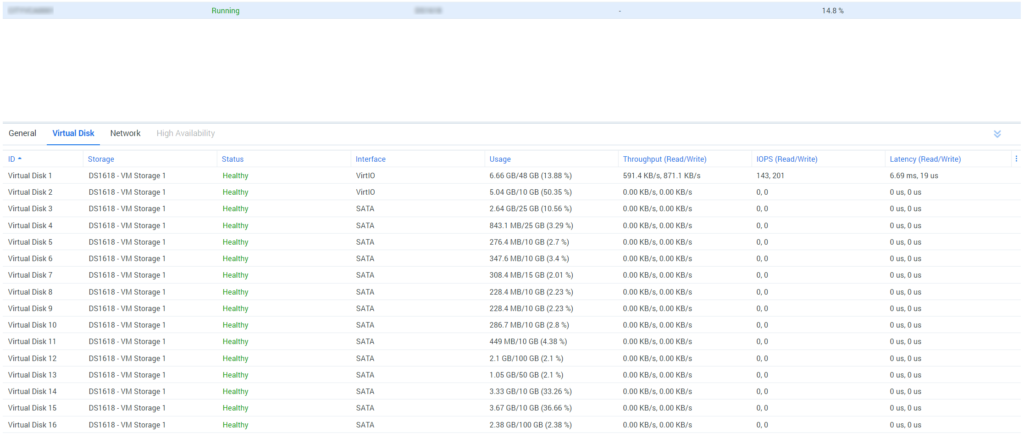
After that I imported all vmdk images to my Virtual Machine Manager via Images -> Disk Images and started “importing” a virtual machine with the uploaded diskimages. Sadly Synology limits the maximum vDisks for new and imported virtual machines to 8. This is not a hard limit as Virtual Machine Manager is run by qemu and qemu limit is 256 disks.

So how about trying to add the disks after the virtual machine creation via command line? I was messing around with this but the vdisks are added via virtio-scsi and I found this hard to add the disks manually.

So lets see if we can achieve this a different way. I analysed the JavaScript used by Virtual Machine Manager. This can be found here “/volume1/@appstore/Virtualization/ui/virtualization.js”. There is even a check in it, that prompts you with an error if a machine has more than 8 vDisks. So how can we increase the maximum virtual machine attachable disks?

TL;DR

Open “/volume1/@appstore/Virtualization/ui/virtualization.js” and edit the value of “this.maxVdiskNum=8” from 8 to 16. Save the file, gzip it again via gzip -k virtualization.js and restart Virtual Machine Manager or your whole NAS.

However for a vCenter it takes sometime to setup the machine. Keep the first two disks with VirtIO and all other disks on SATA Setting.

Good Luck.

Posted in: Synology, vCenter, VMWare / Tagged: QEMU, Synology, vCenter, Virtual Machine Manager, VMWare

Error while trying to Access “Details” of a SharePoint App

November 6, 2015 1:22 PM / Leave a Comment / XeroX

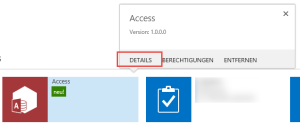
Recently we added Access Services to our SharePoint 2013 environment. After the initial setup we started testing the new implementation and stumbled over an error while accessing the details page of an app. This has nothing to do with access itself, more with apps in general.

2015-11-06_13-03-54

After clicking on details you get an error message with the correlation id. So nothing easier to get the log regarding that error.

SqlError: ‘The EXECUTE permission was denied on the object ‘prc_CountAppInstanceData’, database ‘SharePoint_Logging’, schema ‘dbo’.’    Source: ‘.Net SqlClient Data Provider’ Number: 229 State: 5 Class: 14 Procedure: ‘prc_CountAppInstanceData’ LineNumber: 1 Server: ‘Database.fqdn.com’ f2ec3e9d-ac28-80f1-8d80-1d89f5d672a9
11/06/2015 12:50:34.93  w3wp.exe (Servername.fqdn.com:0x5DE4)            0x5D34 SharePoint Foundation          Database                       5214 Critical Insufficient SQL database permissions for user ‘Name: NT AUTHORITY\IUSR SID: S-1-5-17 ImpersonationLevel: Impersonation’ in database ‘SharePoint_Logging’ on SQL Server instance ‘Database.fqdn.com’. Additional error information from SQL Server is included below.  The EXECUTE permission was denied on the object ‘prc_CountAppInstanceData’, database ‘SharePoint_Logging’, schema ‘dbo’. f2ec3e9d-ac28-80f1-8d80-1d89f5d672a9

This leads us to a permission issue. We tried granting the App Management Service Account “SPDataAccess” permission on our logging database, which did not help.

As you can see in the log there is an user specified IUSR SID: S-1-5-17. This leads to a permission issue from IIS WebServer. Makes sense as all SharePoint Applications are running within the IIS and their Application Pools. As our App Management Service Account wasn’t the issue we granted our Application Pool Account under which the Web Applications are running, the “SPDataAccess” permission on our logging database.

2015-11-06_13-04-42

Et voila, this fixed the issue.

Problem: App Details do not work.

Solution: Grant SPDataAccess Permisson to your Web Application Pool Account on your SharePoint Logging Database.

Posted in: Microsoft, SharePoint / Tagged: Logging Database, Permissions, SharePoint Database

Reinstall WSUS and keep downloaded content

June 3, 2015 8:37 PM / 1 Comment / XeroX

Our scenario was that we wanted to upgrade our WSUS running on Windows Server 2012 to Windows Server 2012 R2 and changing the database to WID. The database wasn’t that important for us, as all computers placed in one group where all patches are approved. But we wanted to keep the content of 800 Gigabyte without redownloading all that stuff.

A huge advantage is if you have the data on a seperate drive or partition. Before you start, shutdown the WSUS Service and rename the WsusContent folder or move it to a different location.

Then you’re good to go. Reinstall or setup a new machine and install WSUS. During the initial configuration wizard its important that you choose “synchronize manually” and do not trigger a sync before or at the end of the wizard. Then copy the previous saved WsusContent folder to the location you’ve chosen in the wizard and replace everything. After that you can manually start your synchronization and WSUS is reindexing the whole content without downloading a huge amount of data. It should take around 3-4 hours, depending on your hardware and disk. You can see the status on synchronization tab.

Good luck!

Posted in: Microsoft, Windows Server / Tagged: keep content, Reinstall, Reinstall WSUS, Setup, Setup WSUS, WSUS

SSLLabs A+ rating with nginx without breaking compatibility

February 4, 2015 5:09 PM / Leave a Comment / XeroX

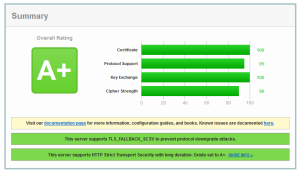
Update 05.03.2015: This configuration is not vulernerable to POODLE, BEAST, HEARTBLEED or FREAK Attack. Proof: SSLLabs.com

After a lot of searching on the internet I found the perfect setting for nginx to get an A+ rating on ssllabs without breaking compatibility. There are some guides, but quite old.

nginx A+

Removing TLSv1 is easy but breaks compatibility to everything lower Android 4.4, Windows 7 IE11 and most search engine crawler.

The following settings are requitred to get A+ rating as of february 2015.

        ssl_protocols TLSv1 TLSv1.1 TLSv1.2;
ssl_dhparam /etc/ssl/nginx/dhparam.pem;
ssl_prefer_server_ciphers on;
ssl_session_cache shared:SSL:10m;
ssl_session_timeout 5m;

ssl_ciphers ‘kEECDH+ECDSA+AES128 kEECDH+ECDSA+AES256 kEECDH+AES128 kEECDH+AES256 kEDH+AES128 kEDH+AES256 DES-CBC3-SHA +SHA !aNULL !eNULL !LOW !MD5 !EXP !DSS !PSK !SRP !kECDH !CAMELLIA !RC4 !SEED’;

# HSTS (ngx_http_headers_module is required) (15768000 seconds = 6 months)
add_header Strict-Transport-Security max-age=15768000;

resolver <trusted DNS Server>;

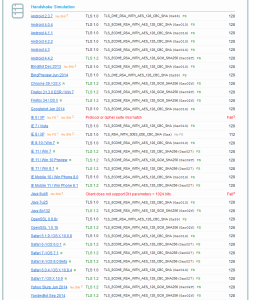
After restarting nginx you will see the result above with the following ciphers:

Ciphers


If you’re interested in even more compatibility Mozilla SSL Configuration Generator may help you to suit the configuration your needs.

Note: A+ can only be reached with SHA2 certificate or higher. Best you can reach with SHA1 is A rating.

Posted in: Webserver / Tagged: a+ rating, beast, configuration, freak, heartbleed, nginx, poodle, ssl, ssllabs, webserver

Can’t reach NAS4Free after configuring LAGG

August 27, 2014 9:49 AM / Leave a Comment / XeroX

After configuring LAGG (Failover) your NAS4Free instance is not reachable.

This can happen if you assigned an ip address to a network adapter (bce0, bce1, …) prior you switched to LAGG. You can simply fix this by opening /etc/rc.conf and removing all assinged ip addresses to single adapters.

Remove ipv4_addrs_bce0=”0.0.0.0/0″, … and reboot. Thats it.

Posted in: FreeBSD / Tagged: Failover, FreeBSD, LAGG, NAS4Free

JBOD with HP Smart Array P410i

August 27, 2014 9:26 AM / 1 Comment / XeroX

I was trying to install NAS4Free (FreeBSD) on a HP ProLiant DL380G7. I entered Configuration Utility for the RAID Controller (HP Smart Array P410i) and removed all logical drives, as there is no need for a hardware raid if you’re going to use ZFS. I assumed no logical drives = JBOD but I was wrong.

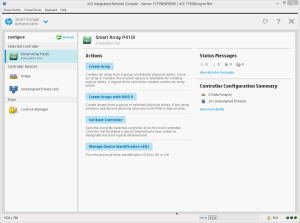
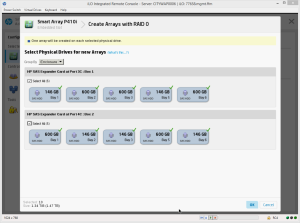
The HP Smart Arry P410i does not support JBOD Configuration. HP seems to be aware of this so they created a…hmm… kind of a workaround. Simply boot up the latest smartstart package and start the smart storage configuration utility. In there you can create an array with RAID0, there is even a button for it.

20-08-_2014_09-52-03

Press “Create Array with RAID 0”.

20-08-_2014_09-52-32

Select all available disks.

20-08-_2014_09-53-54

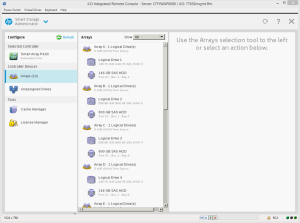
After that you created a RAID0 on each physical drive.

Thats it. Its no pass-through but works like jbod.

Good luck.


Posted in: Hardware / Tagged: BSD, HP Smart Array, HP Smart Array P410i, JBOD, P410i, ProLiant, RAID, ZFS

Error during install of Microsoft Workflow Manager 1.0 Refresh

June 30, 2014 1:34 PM / Leave a Comment / XeroX

Installing the Workflow Manger 1.0 Refresh can be tricky.

During Installation process with the web platform installer 5.0 (only way to install it) the setup of Microsoft Windows Fabric V1 CU1 fails. When you open the log it says 1603.

So lets see what 1603 means. Open cmd prompt and type net helpmsg 1603.

C:\>net helpmsg 1603

Fatal error during Installation.

Not very expressive. But there is a simple solution, install Visual C++ Redistributable for Visual Studio 2012 Update 4.


Source: Social MSDN

Posted in: Microsoft, SharePoint / Tagged: Fabric V1, Web Platform Installer, Workflow Manager

Change network profile of Windows Server 2012 R2

June 6, 2014 11:51 PM / Leave a Comment / XeroX

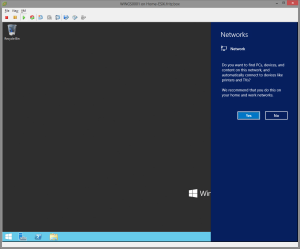
After installing Windows Server 2012 R2 or Windows 8.1 you will be asked if this is a home/work network or not. Based on that windows will choose your network profile.

Network ProfileI was some kind distracted and accidently clicked in the middle of the desktop and the sidebar disappeared. Windows decided that this is a “No” and you will be on a public network. I’ve no idea why but you can not change it through the network and sharing center, all settings you’re trying to set will be set back to default of public networks. Like network discovery. So how to change it? Quite easy, just open the registry and navigate to the following path:

HKEY_LOCAL_MACHINE\SOFTWARE\Microsoft\Windows NT\CurrentVersion\NetworkList\Profiles

There will be at least one key in that list. Simply delete the one you want to reset and reboot your machine. After that you will be asked again. However I would only recommend that method if that happened to you right after the setup as I don’t know if some firewall rules will be reset or deleted.

Posted in: Microsoft / Tagged: Network Profiles, Windows 8.1, Windows Server, Windows Server 2012, Windows Server 2012 R2

Windows 2012 R2 Data Deduplication and ISOs

June 1, 2014 4:11 PM / Leave a Comment / XeroX

I’ve tried to install some machines on my Hyper-V. All ISOs were placed on the second drive where data deduplication is enabled. With deduplication enabled I ran into the problem that no serial/license number was accepted neither the AVMA Key nor the generic KMS Key or my own key. After hours of searching for solutions on the web and no solution in sight. I copied the iso to drive D again. Suprise it was working! One day later I tried to install a new machine and it wasn’t working again. No key accepted. After moving it to drive C where no deduplication happens its working again.

Conclusion: Never ever put windows installation media on a drive with data deduplication enabled.

Posted in: Microsoft / Tagged: data deduplicaiton, no key accepted, no license number accepted, no serial accepted, Windows Server 2012 R2

Post Navigation

« Previous 1 2 3 4 Next »

Support This Site

If you like this content, you can buy me a coffee

Recent Posts

  • Super Famicom/Super Nintendo xBAND XBⱯND – Teardown
  • Gigabyte ITE IT5701/ 5702 Firmware Archive
  • Speed-Up/Tune Synology DSM with HDD & SSD
  • Dreamcast – Skies of Arcadia – PAL – 60Hz – VGA Patch
  • Running Sierra Wireless EM7455 on FreeBSD/OPNSense/pfSense

Recent Comments

  • Raoul on Running Sierra Wireless EM7455 on FreeBSD/OPNSense/pfSense
  • Raoul on Running Sierra Wireless EM7455 on FreeBSD/OPNSense/pfSense
  • XeroX on Running Sierra Wireless EM7455 on FreeBSD/OPNSense/pfSense
  • Chris on Running Sierra Wireless EM7455 on FreeBSD/OPNSense/pfSense
  • Chris on Running Sierra Wireless EM7455 on FreeBSD/OPNSense/pfSense

Archives

  • January 2025
  • July 2024
  • October 2023
  • February 2023
  • November 2022
  • September 2022
  • September 2021
  • August 2021
  • November 2020
  • November 2015
  • June 2015
  • February 2015
  • August 2014
  • June 2014
  • March 2014
  • February 2014
  • January 2014
  • November 2013
  • September 2013
  • August 2013

Categories

  • ESXi
  • FreeBSD
  • Hardware
  • Hyper-V
  • iOS
  • Microsoft
  • Nintendo
  • OfficeWebApps
  • Operations Manager
  • Retro
  • SharePoint
  • Synology
  • Teardown
  • vCenter
  • VMWare
  • Webserver
  • Windows Server
© Copyright 2025 - Techspark
Infinity Theme by DesignCoral / WordPress